Longs Peak Hiking Guide - Summer 2009
This is part two of a two part series on Rocky Mountain National Park and Longs Peak. This part describes my experiences hiking Longs Peak.
Part 2 – Hiking Longs Peak
When we were first reading through the section in our Frommers book on Rocky Mountain National Park and read about the Longs Peak hike, we were immediately interested.
16 Miles RT, Strenuous, Access Longs Peak Ranger Station
Recommended only for experienced mountain hikers and climbers in top physical condition, this trail climbs 4,855 feet along steep ledges and through a narrows to the top of 14,259 foot Longs Peak, the highest point in the park. The trek takes most hikers about 15 hours to complete and can be done in 1 or 2 days. Those planning a 1 day hike should consider starting extremely early, so they will be well off the peak before the summer afternoon thunderstorms arrive. ... Those making the hike in early summer (usually until mid-July should be prepared for icy conditions.
Our thought process (yea we are a little crazy) -- Oh, only experienced hikers, 4,855 climb, 16 miles, thunderstorms, 14,259 elevation, icy conditions... sounds great! Lets figure out how to do it.
We planned to spend 4 nights and 3 days in RMNP after reading this to acclimate to the altitude, as we knew 14,259 ft is incredibly high.
We proceeded as follows. You will notice how most of our actions are dictated by the altitude preparation, your time will differ most likely.
- Our first night we got lucky as hell and managed to snag a campsite at Longs Peak Campground. Why do I say luck as hell? We got there at 3pm on a Saturday afternoon and somebody pulled out just as we got there. Also, there are only 26 spots in the entire campground. The reasons we camped there were that it is about a 1/4 mile from the Longs Peak Trail Head, which not only means you don't have to fight for parking at 2am, but also you can sleep later. In addition, the campground is at 9,400 feet, which helped us acclimate whenever we were at camp, as opposed to most of the other campgrounds that were 1,000 to 2,000 feet lower.
- Our first day was what you just read about, where we hiked a little bit near the highway, drove through the park, toured Grand Lake, etc.
- Our second day was an acclimation day, literally. We drove about halfway up the highway to the Alpine Visitor Center and took in the views from the cafe there. This is at approximately 11,000 feet. We also stole a ton of saltines which we ate with peanut butter.
- Our third day is when we actually climbed Longs Peak, which I will now detail.
Sorry, but before I get started, this hike unfortunately demands another disclaimer.
LONGS PEAK WAS THE MOST DANGEROUS HIKE WE COMPLETED
A MAN DIED ON IT THE DAY BEFORE WE GOT THERE
THIS HIKE CAN KILL YOU, AND IT ALMOST KILLED US
YOU ARE RESPONSIBLE FOR YOUR ACTIONS ON LONGS PEAK
YOU NEED TO MAKE A CALL ABOUT THE WEATHER AND YOUR PHYSICAL CONDITION
THE ALTITUDE + ICE + COLD + THUNDER + DISTANCE MAKE THIS HIKE EXTREMELY DANGEROUS
DO NOT ATTEMPT IT UNLESS YOU ARE ABSOLUTELY PREPARED FOR IT
ONE LAST THING -- DON'T BE STUPID AND MAKE A RANGER RISK THERE LIFE FOR YOU, IT JUST ISNT WORTH IT
Necessary Equipment to Climb Longs Peak
- We each brought 7 liters of water, as there are no places to refill along the way.
- This is one of those hikes where you need to layer. For example, I wore a pair of underwear, sweatpants, and REI thin khaki hiking pants over those. I also wore 2 cotton t-shirts plus my North Face windbreaker and one pair of socks. Those clothes kept me warm enough.
- Depending on your preference, you should bring an extra shirt to layer. However, you should definitely bring two extra pairs of socks, as they will get wet from melting snow. (The trail actually turned into a stream for us in some parts.)
- Bring plenty of food, whatever you choose to bring.
- Headlight and flashlight.
- Knife
- A good pair of gloves (I will elaborate on this later.)
- Crampons (they would have made it 10x easier for us at least)
To start of the day right (no Foldgers here, sorry) we got up at 1:20am (that's right am, what's the point of going to sleep in a way) and ate one of our signature Peanut Butter Power Bar monstrosities for "breakfast". After signing the guest book, we started hiking and were on the trail at 1:55am. An interesting note about the guest book, which you should sign by the way: apparently, the rangers don't check it on a daily basis, they will only check it if someone reports you missing. If you haven't signed back in, they will start a search. So just make sure someone knows you are hiking the mountain and that if you don't call them, for them to call the ranger station. Another important thing to note is that while the trail is relatively straightforward, this is where both your headlight and flashlight will come in handy. The trails are completely dark, and unless you have a full moon, you will be out of luck without a flashlight.
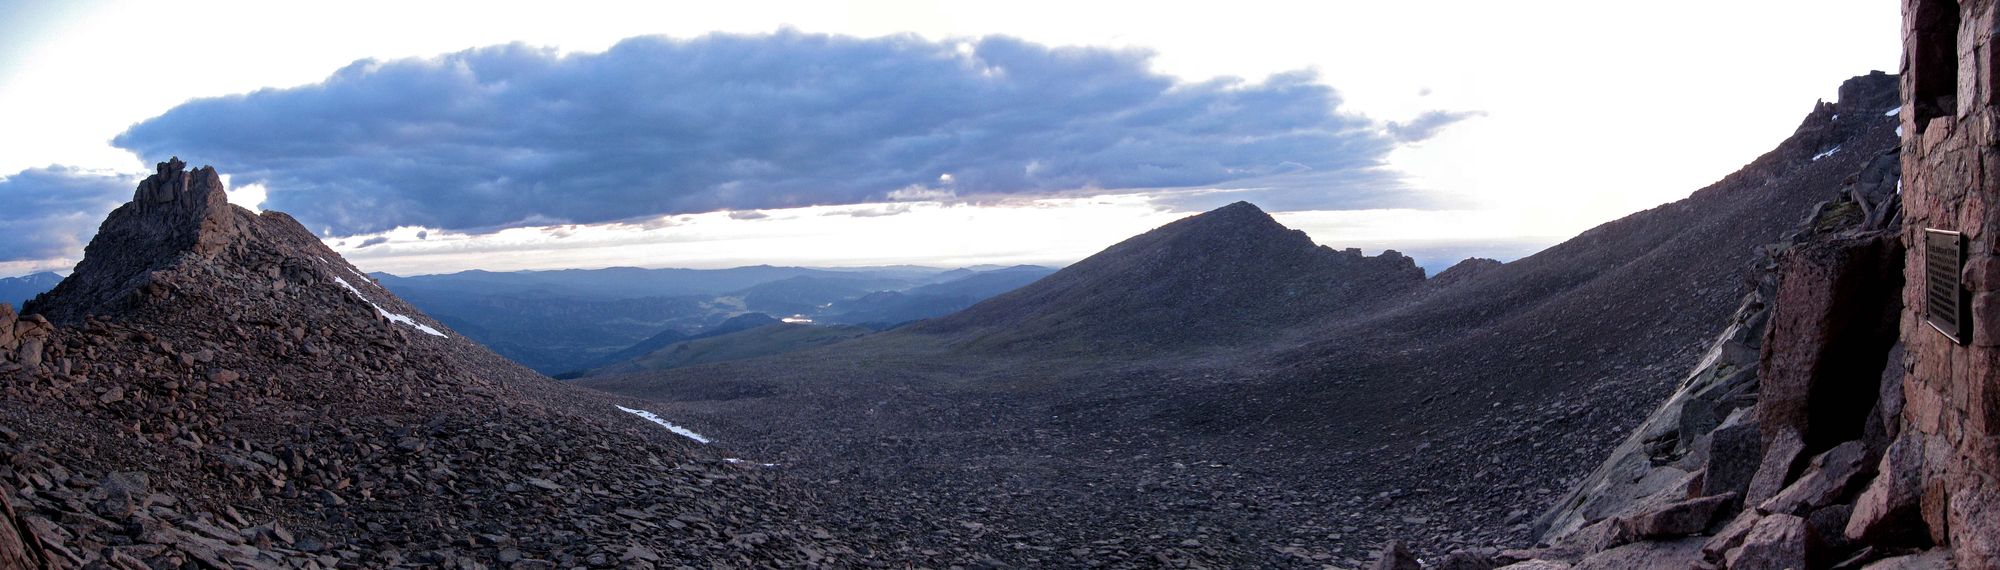
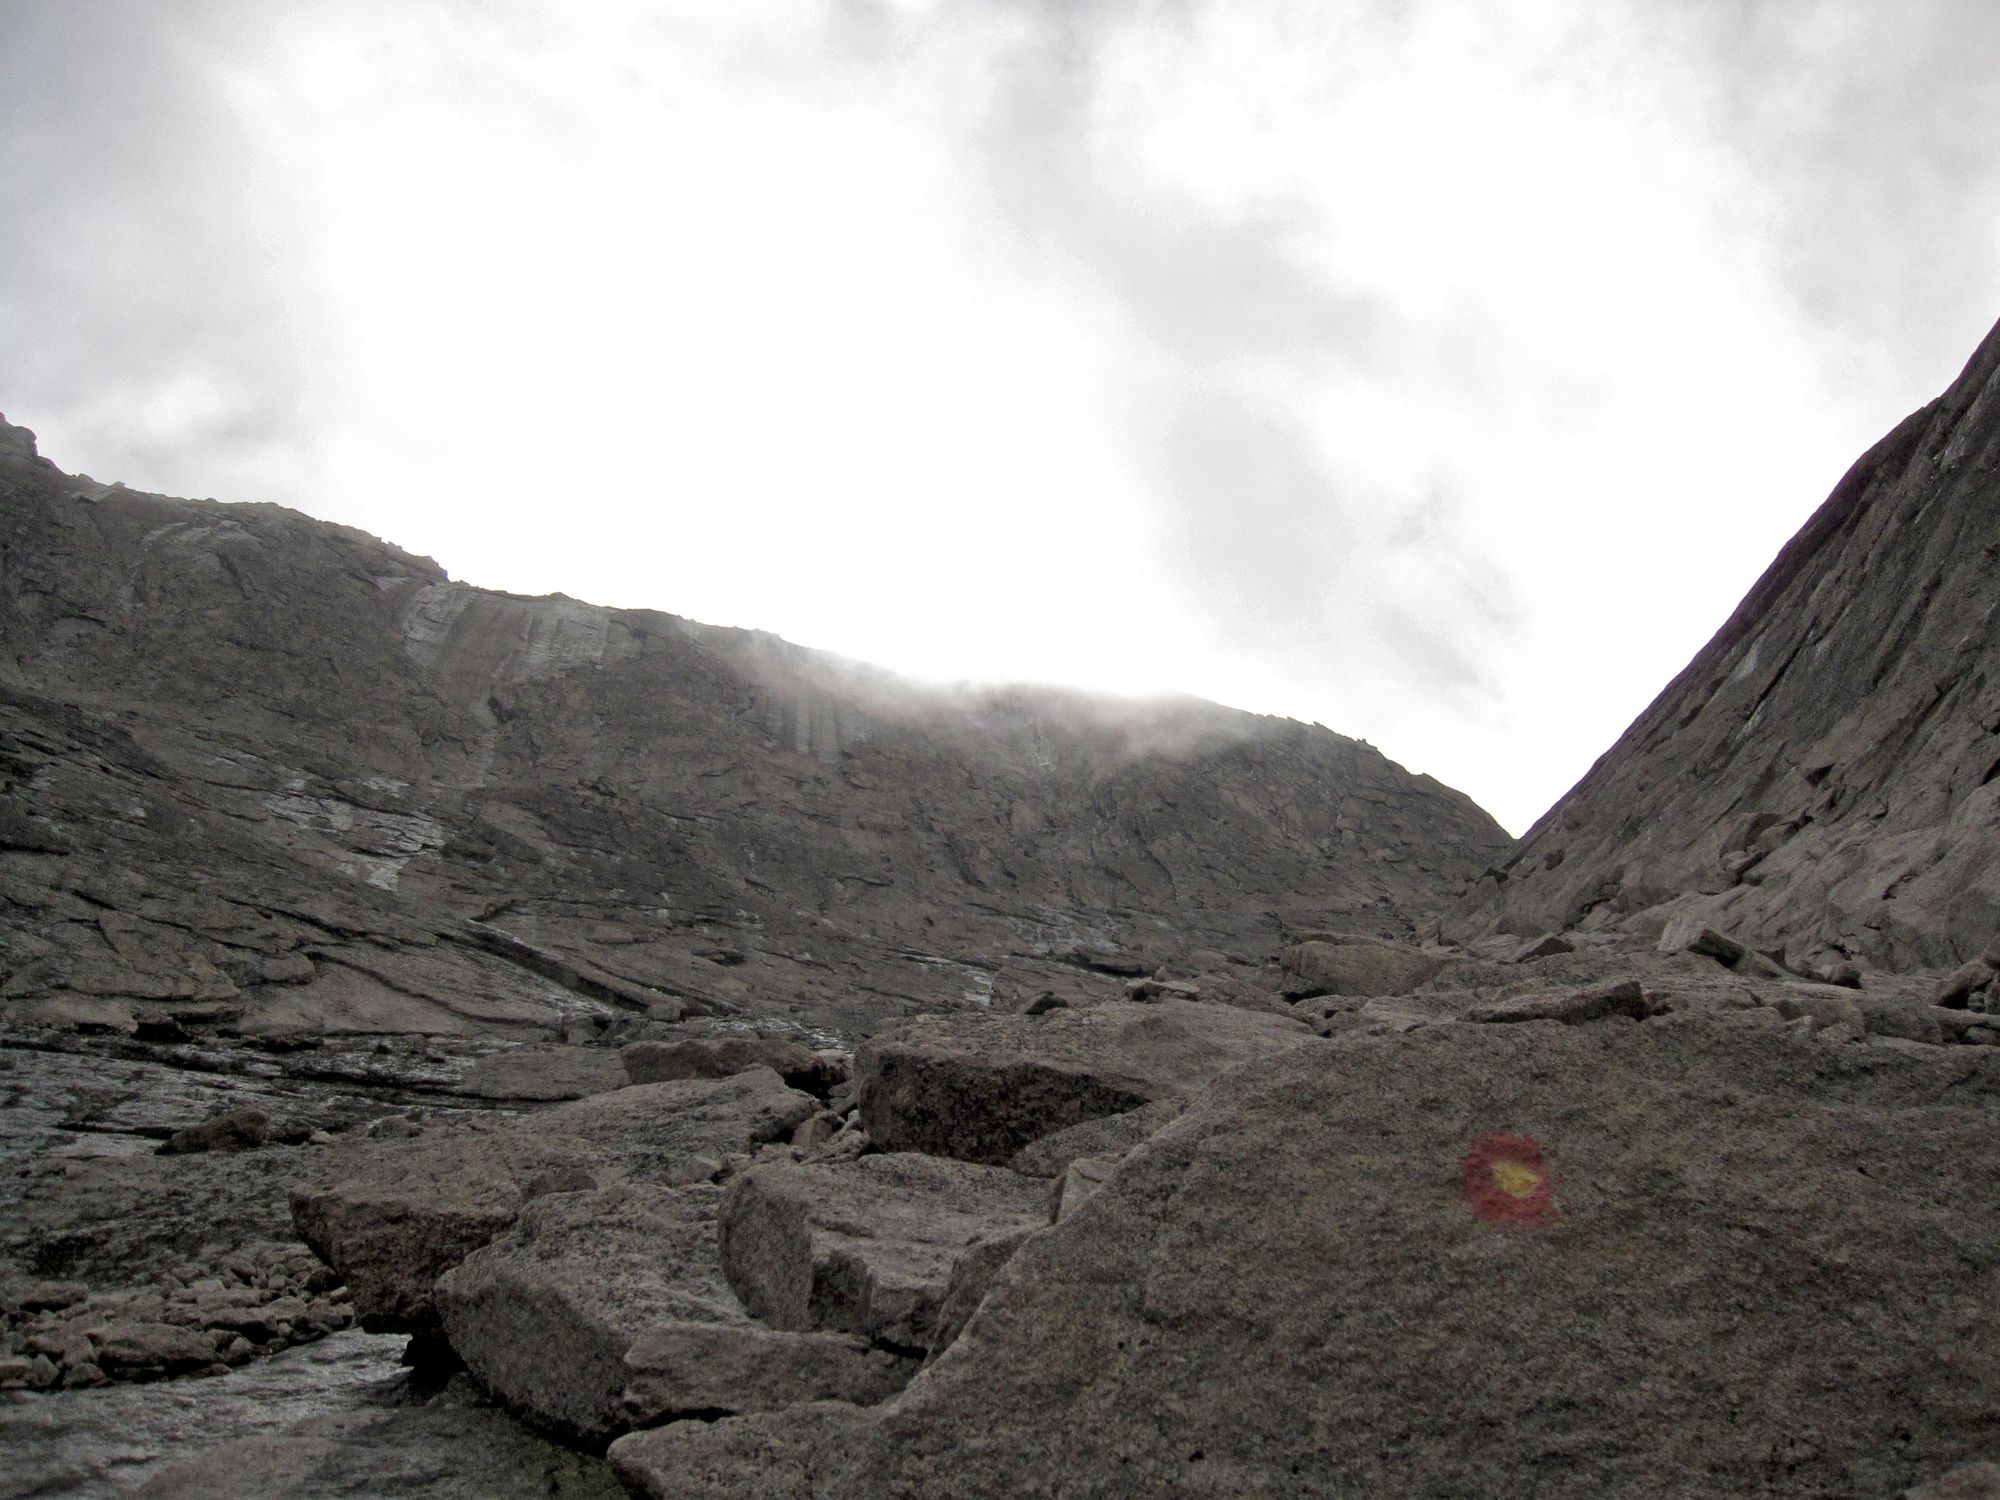
The first couple of miles we burned through, 3 in the first hour. After that it starts to get a little bit steeper. We got lucky once again in that it we had a clear sky for the entire time we hiked and surprisingly did not get rained on once. However, the wind can get quite fierce, so bring a good windbreaker. It took us another 3 hours to wind our way up to the first "checkpoint" of sorts on the way to the top of Longs Peak, The Keyhole.
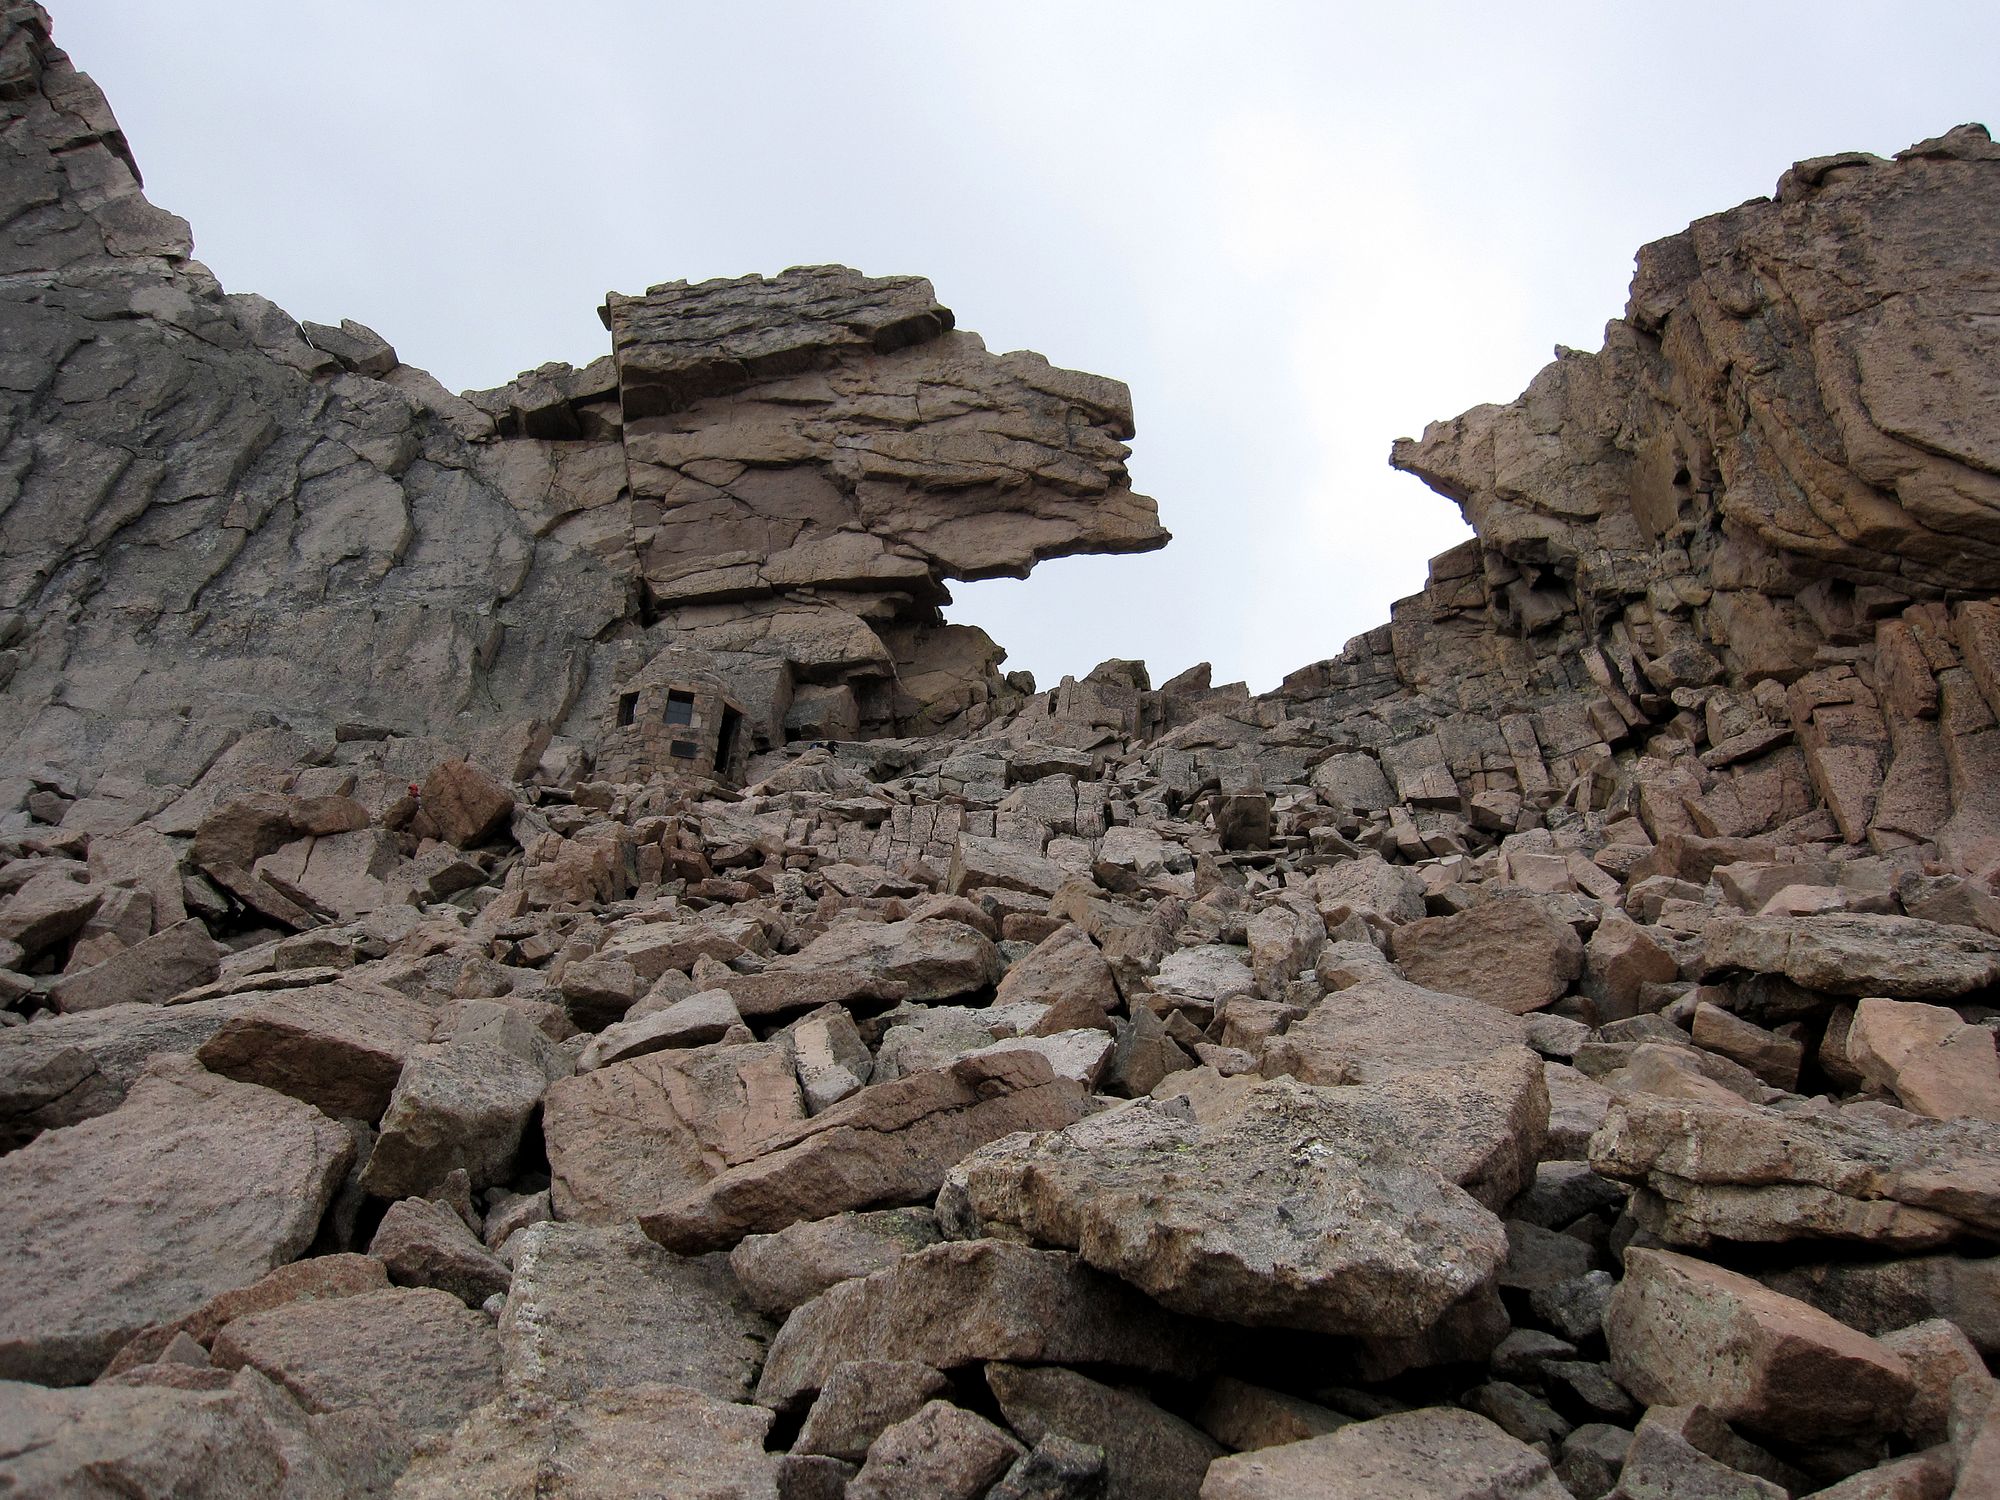
The Boulder Field/Keyhole area is the first checkpoint because this is where you will determine if the weather conditions will allow you to summit Longs Peak. Also, you cannot go past this point until it gets light, as the trail past The Keyhole is where it gets really interesting. In addition, the only trail markers are these spray painted bulls eyes that you can't see until it is light. It is also a really good place to take a break and eat something as there is a little hut up there where you can get out of the wind.
To put in perspecitive how serious the weather issue is, we waited for about an hour before the wind died down enough for us to even look through the Keyhole. After the wind died down I used my iPhone and an application called the Weatherbug (yea, ATT has service on Longs Peak, but not at my house, good job) to get live weather data and radar around our GPS location. This allowed us to check that the skies were clear for 75 miles in every direction around us, giving us the confidence to go for it. This real time information is key as the weather can change by the minute up there, and as it takes 3-5 hours to climb up to the summit and down, you need to make sure you have a large window with room for slowdowns. This is no joke, we had a hard time climbing in good weather, we couldn't imagine it with rain.
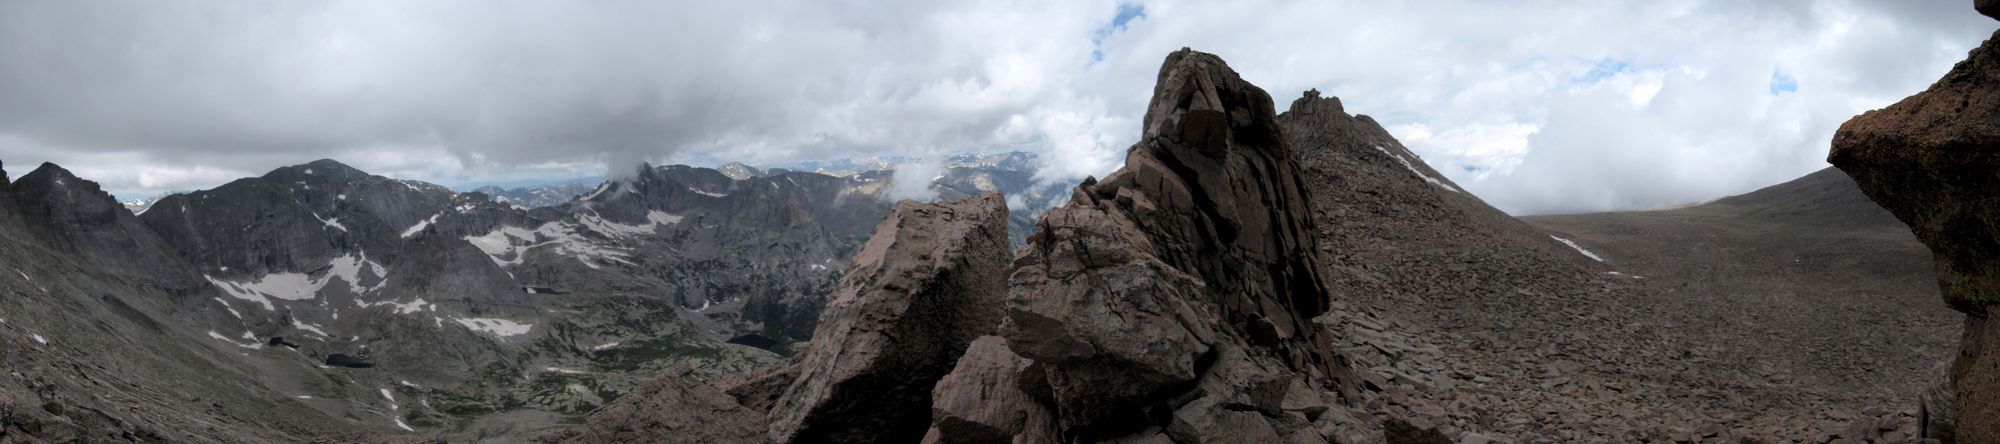
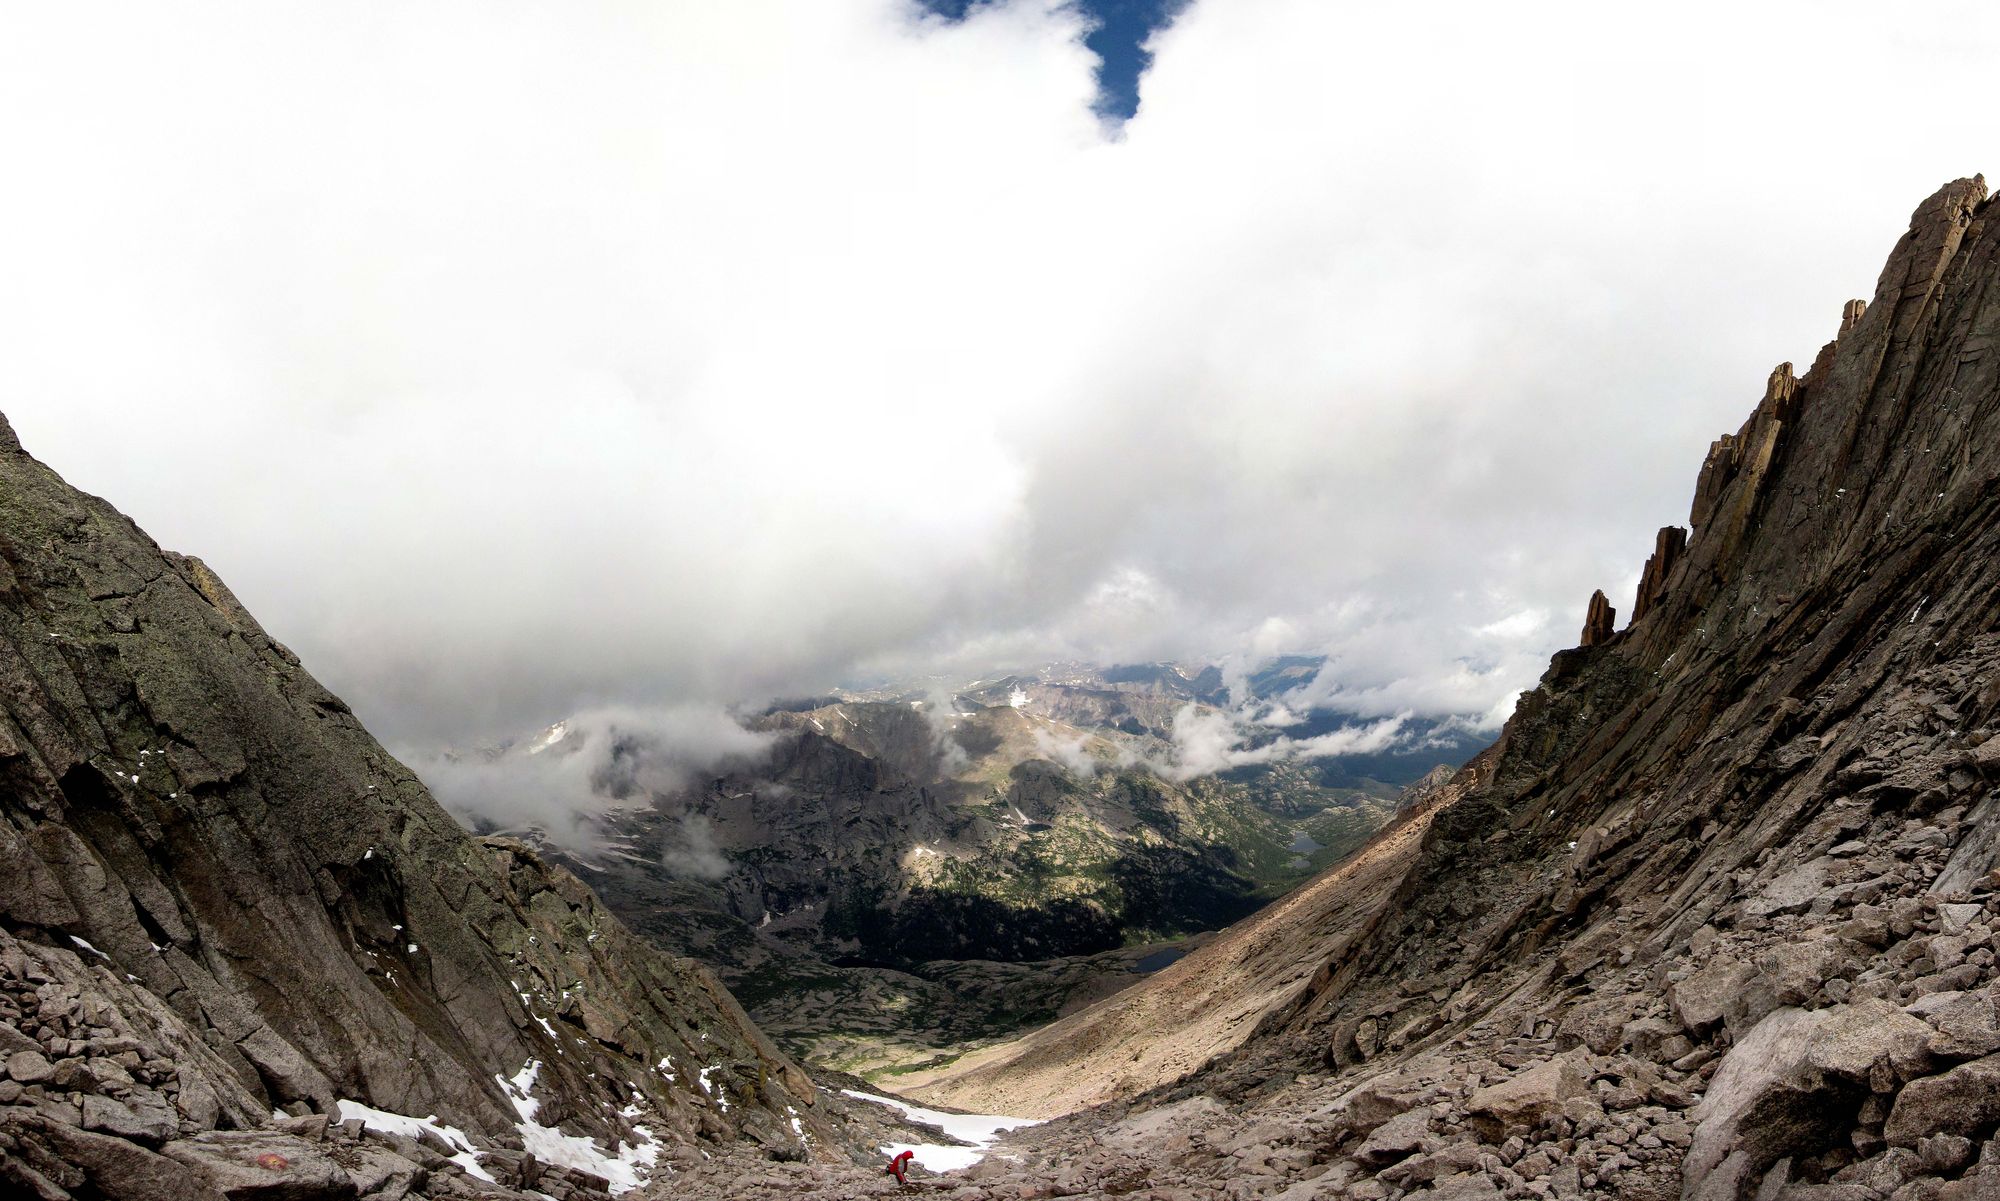
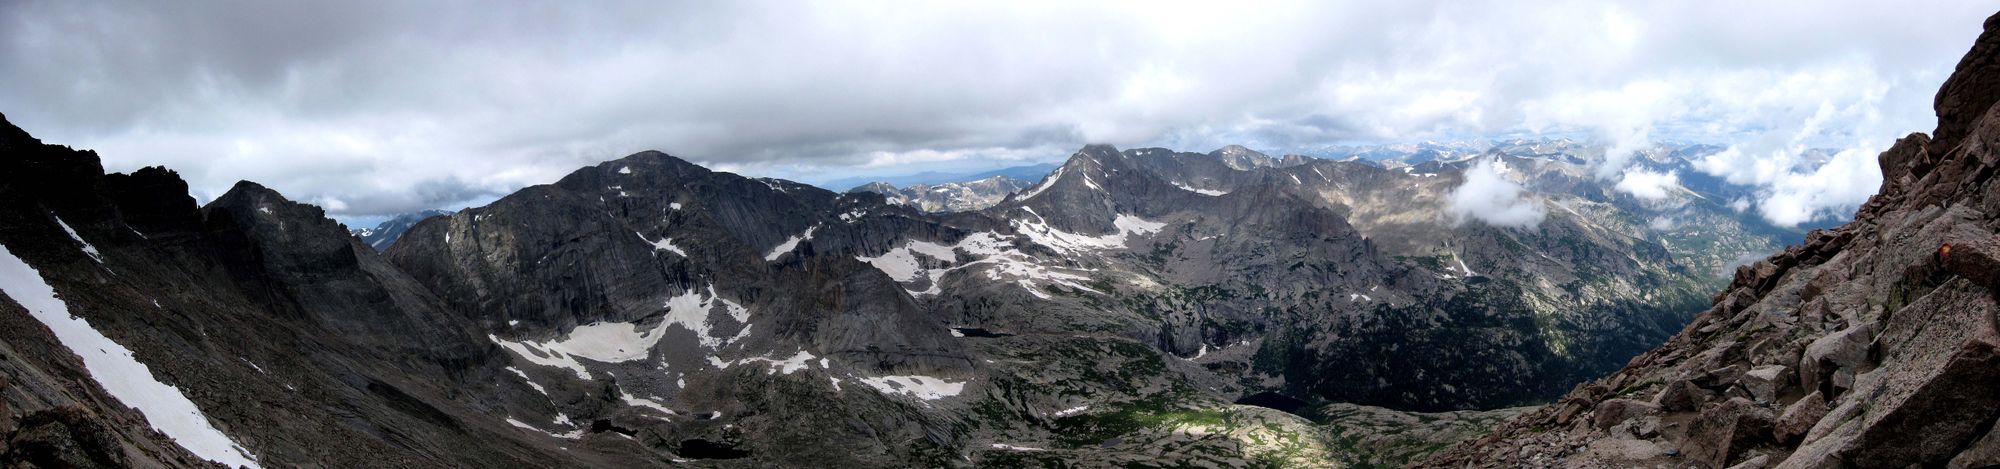
So, after making the call in regards to the weather, we proceeded through the Keyhole to the section of the trail that takes you along extremely narrow ledges (not the time for vertigo, as these cliffs are often 1,000ft tall) on the way to the section called the Trough. The "Ledges" section was not that bad in comparison the rest of the hike. It was slightly icy and snowy, but overall, taking it very slowly and carefully, it is not that bad. Just don't look down! The views all along this section are spectacular as well.

The next part of the trail involves climbing over 1,000 feet up through the Trough to the next section called the Notch. This part is where it begins to get a little trickier. When we were climbing this section (mid-July), ice and snow were melting, turning the once frozen gravel into slippery, muddy, gravel. This part is more challenging that the Ledges, but again, if you go slowly and are careful, it is challenging but not impossible. This section is similar to the Boulder Field in that it is composed of, duh, large boulders.
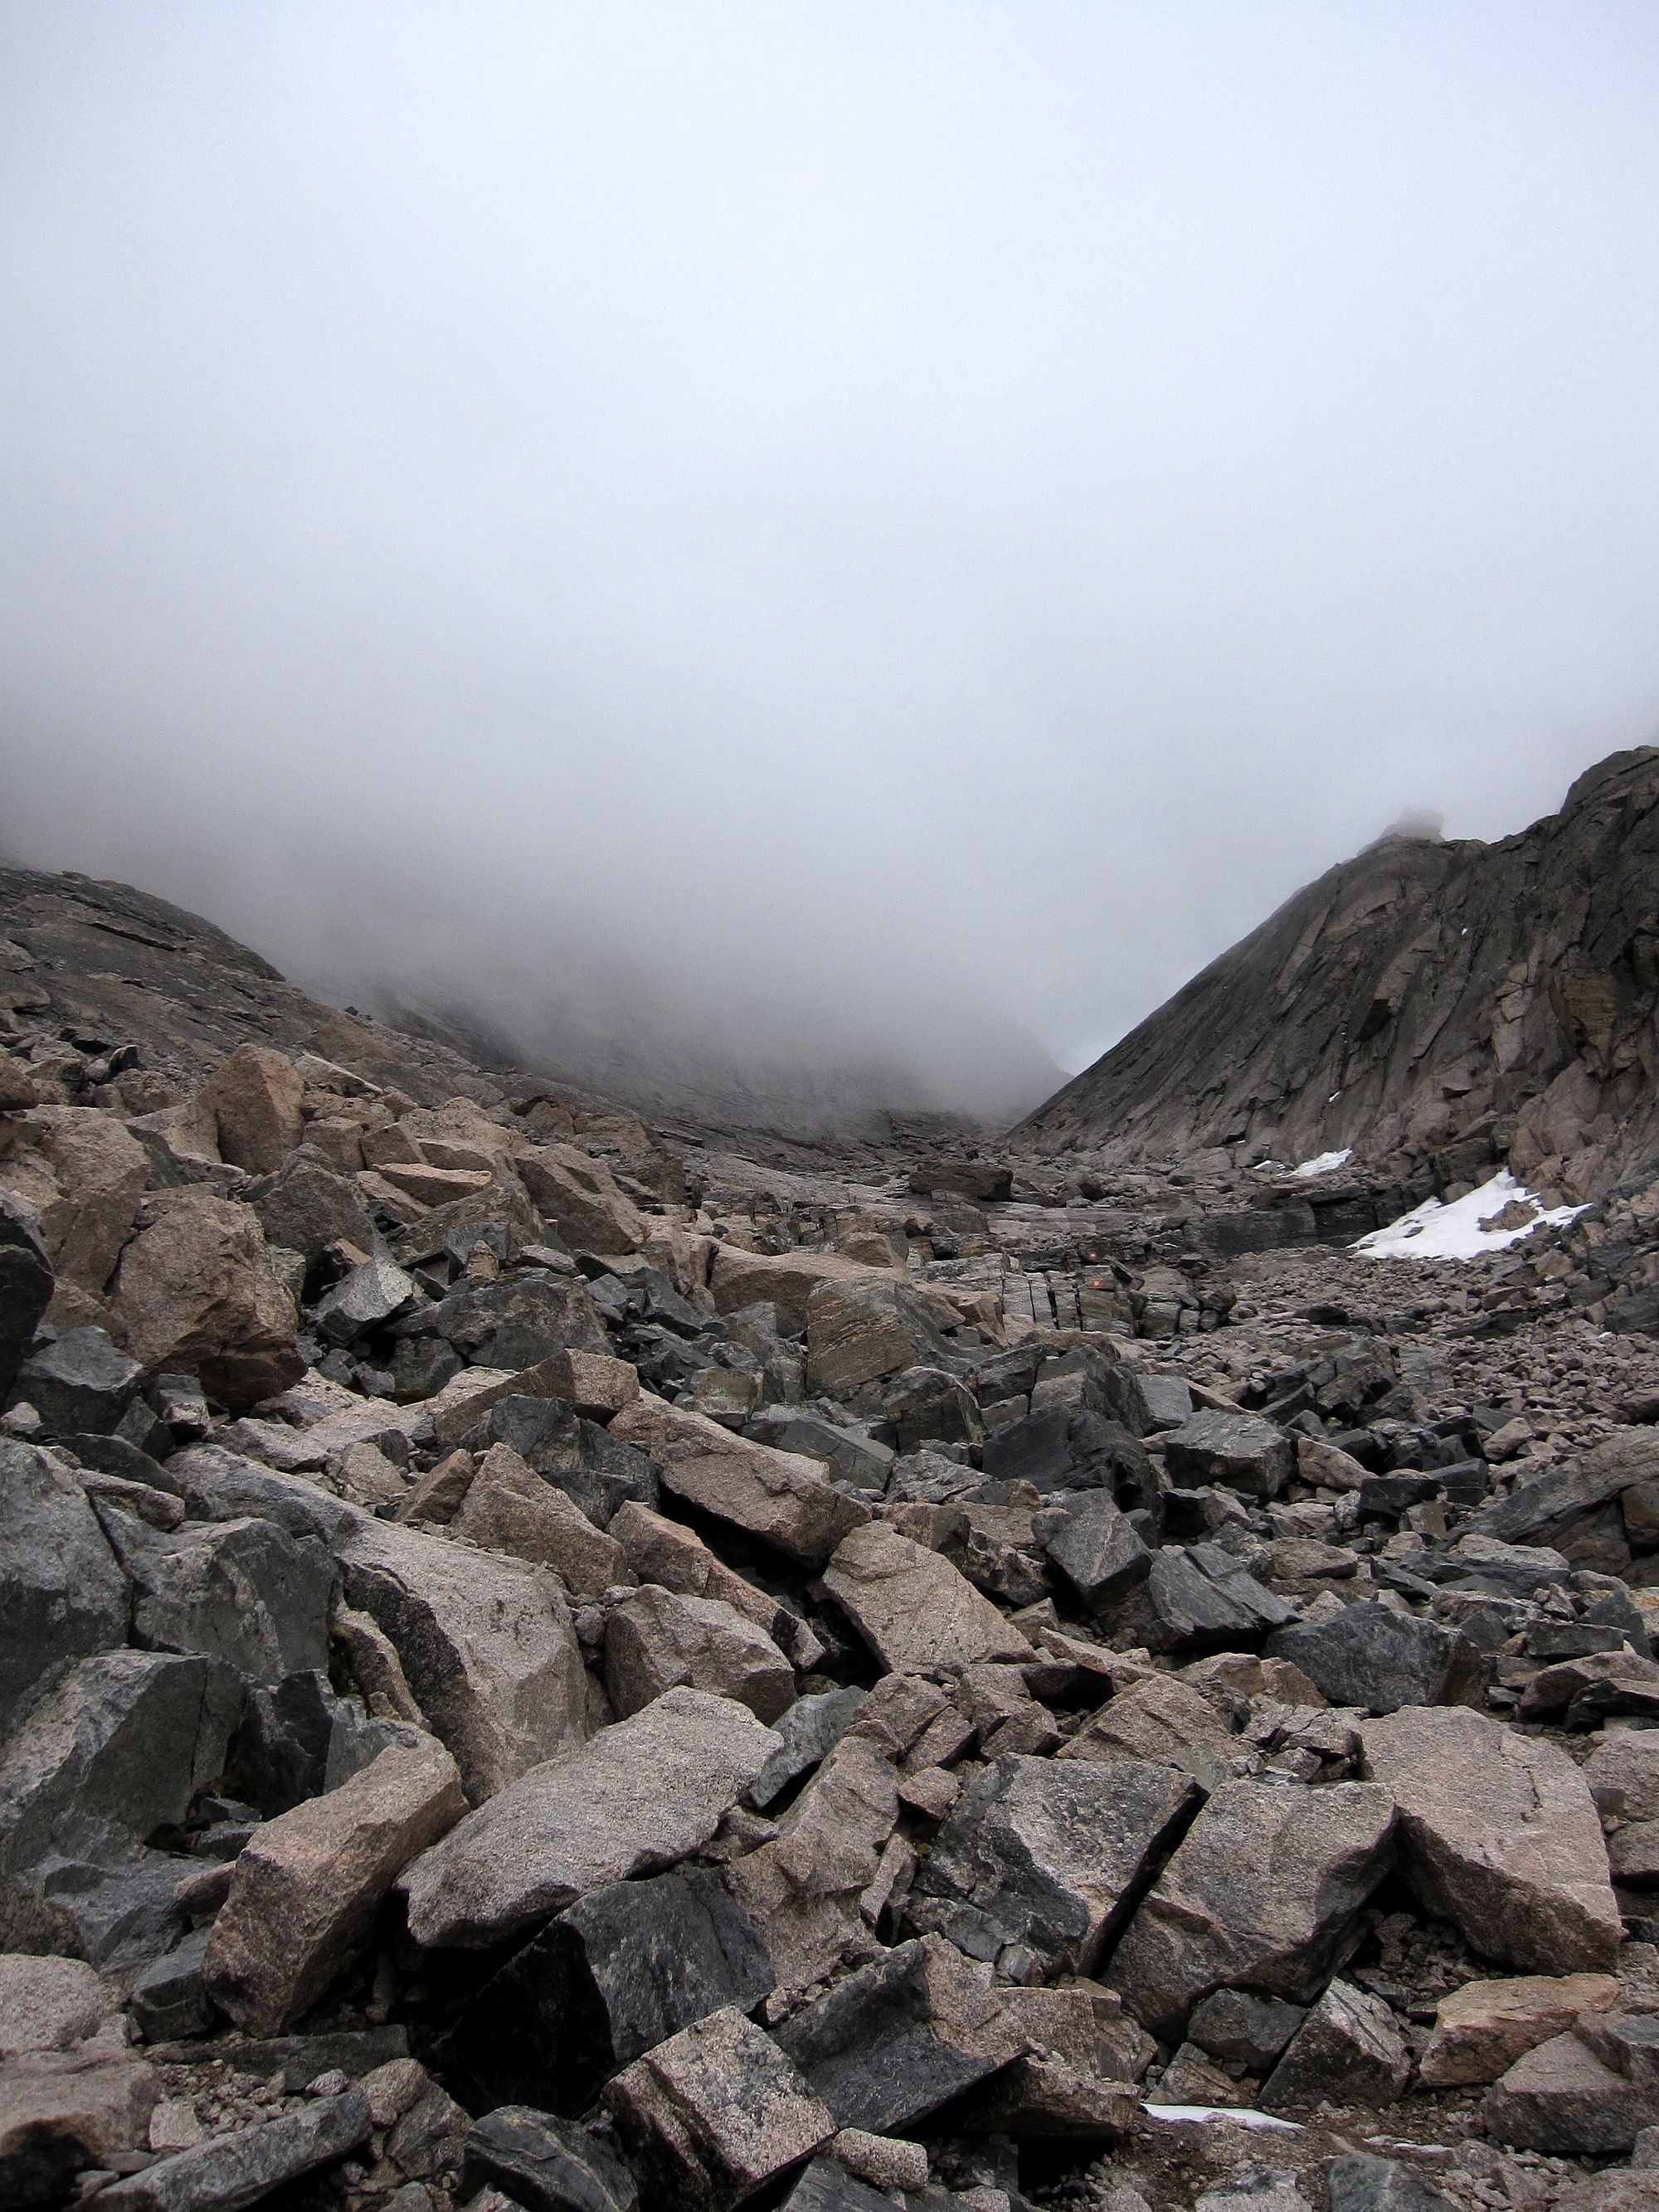
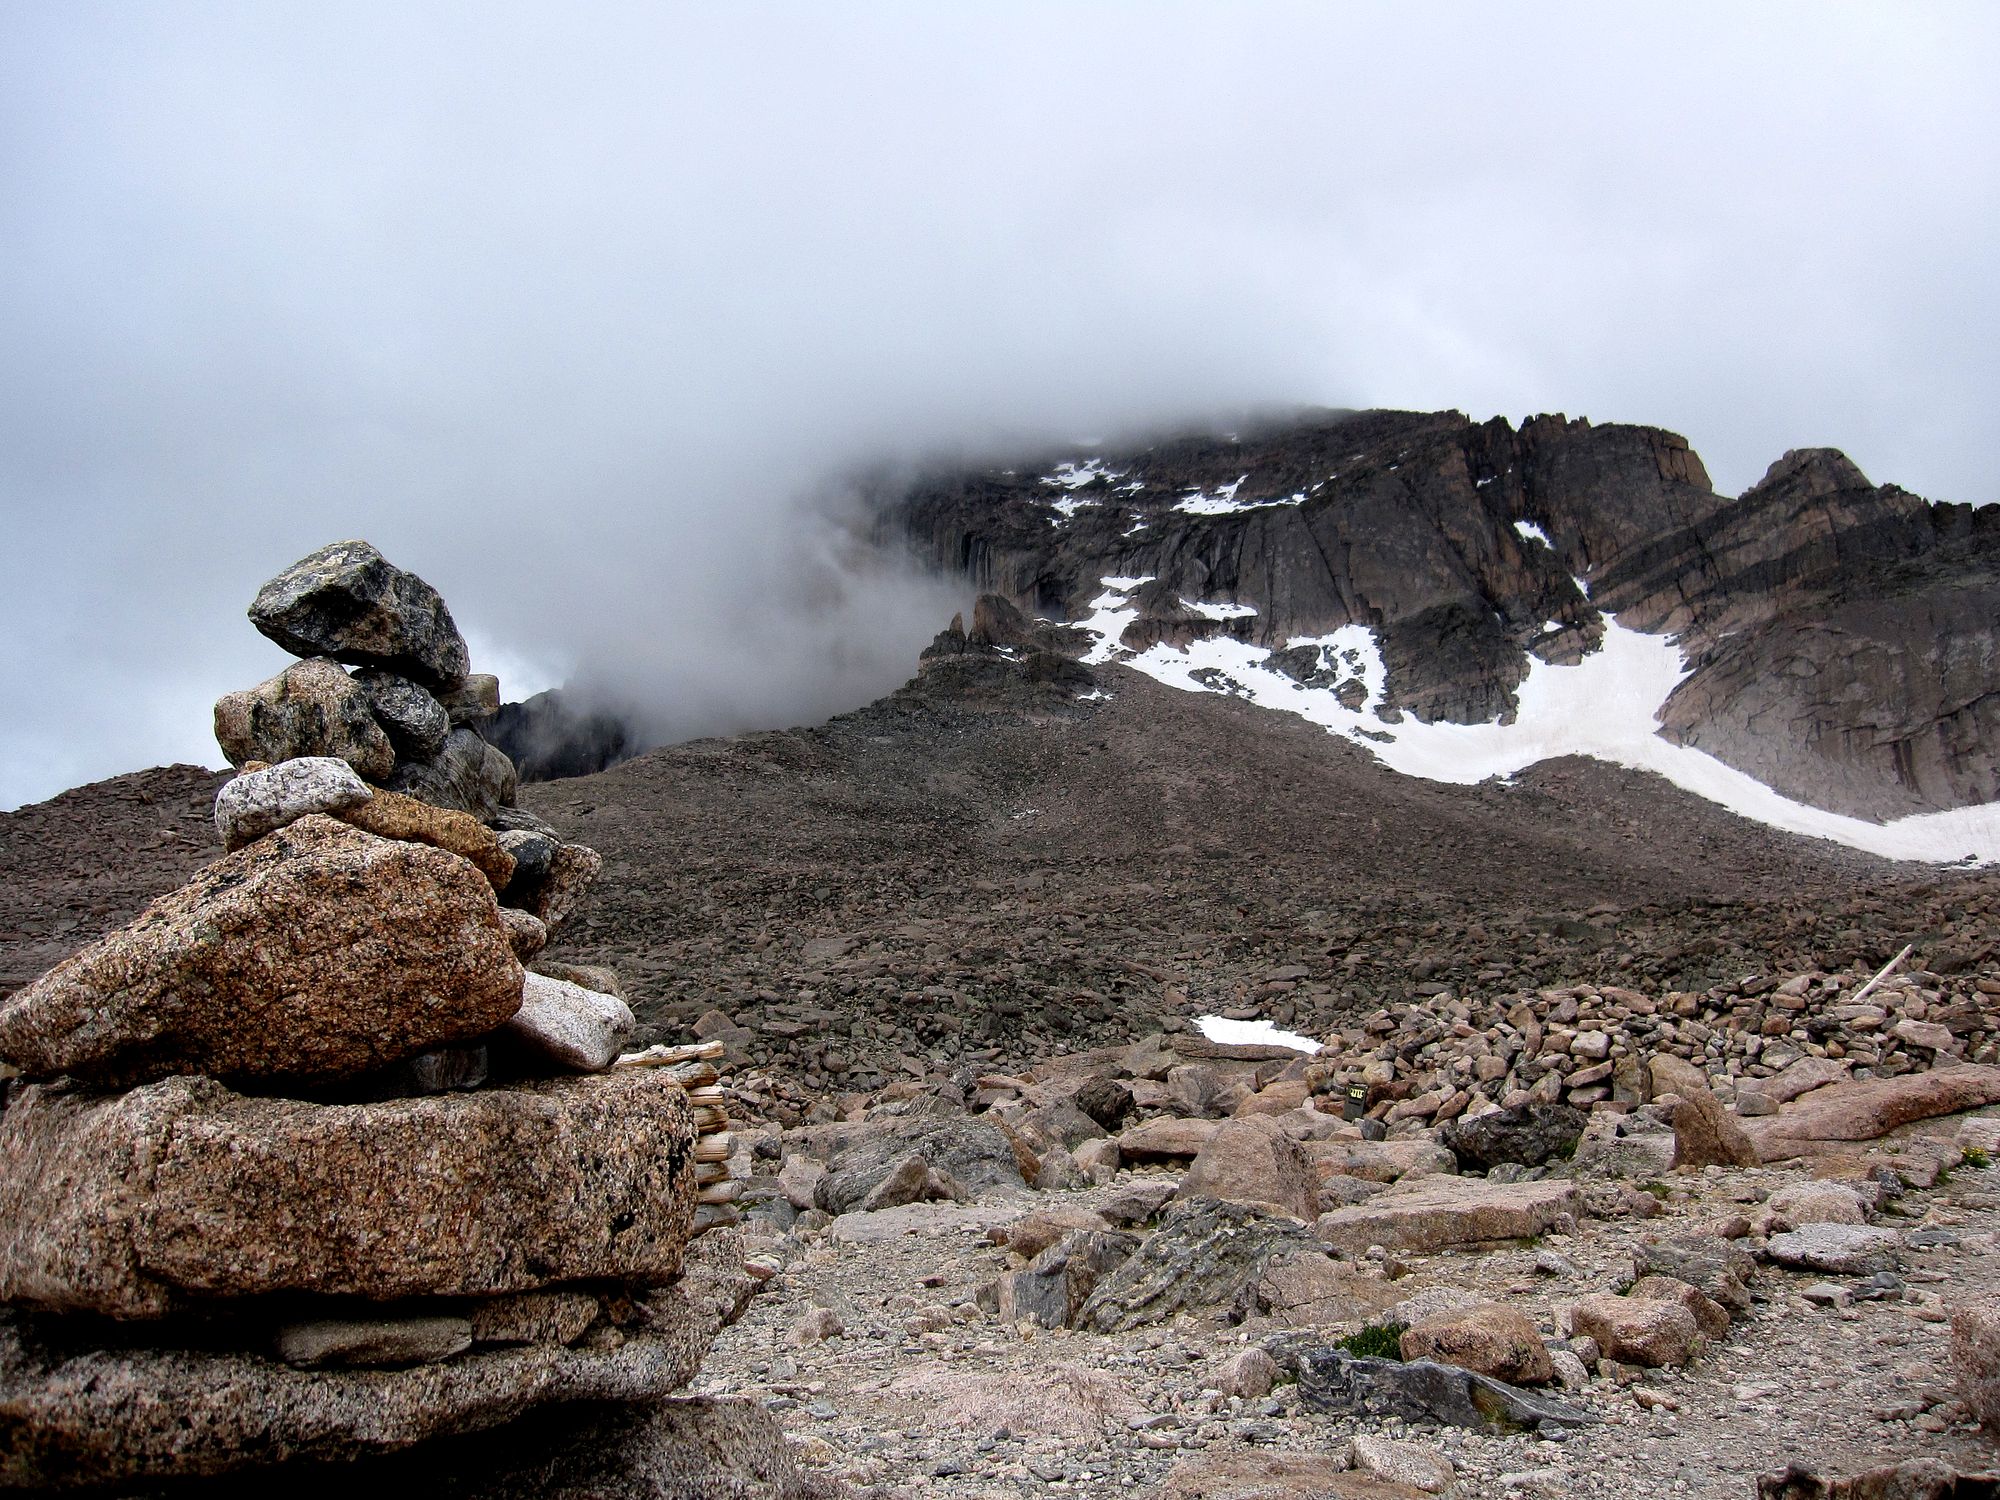
After you complete the Trough, you will arrive at an area called the Notch, which looks like the following:

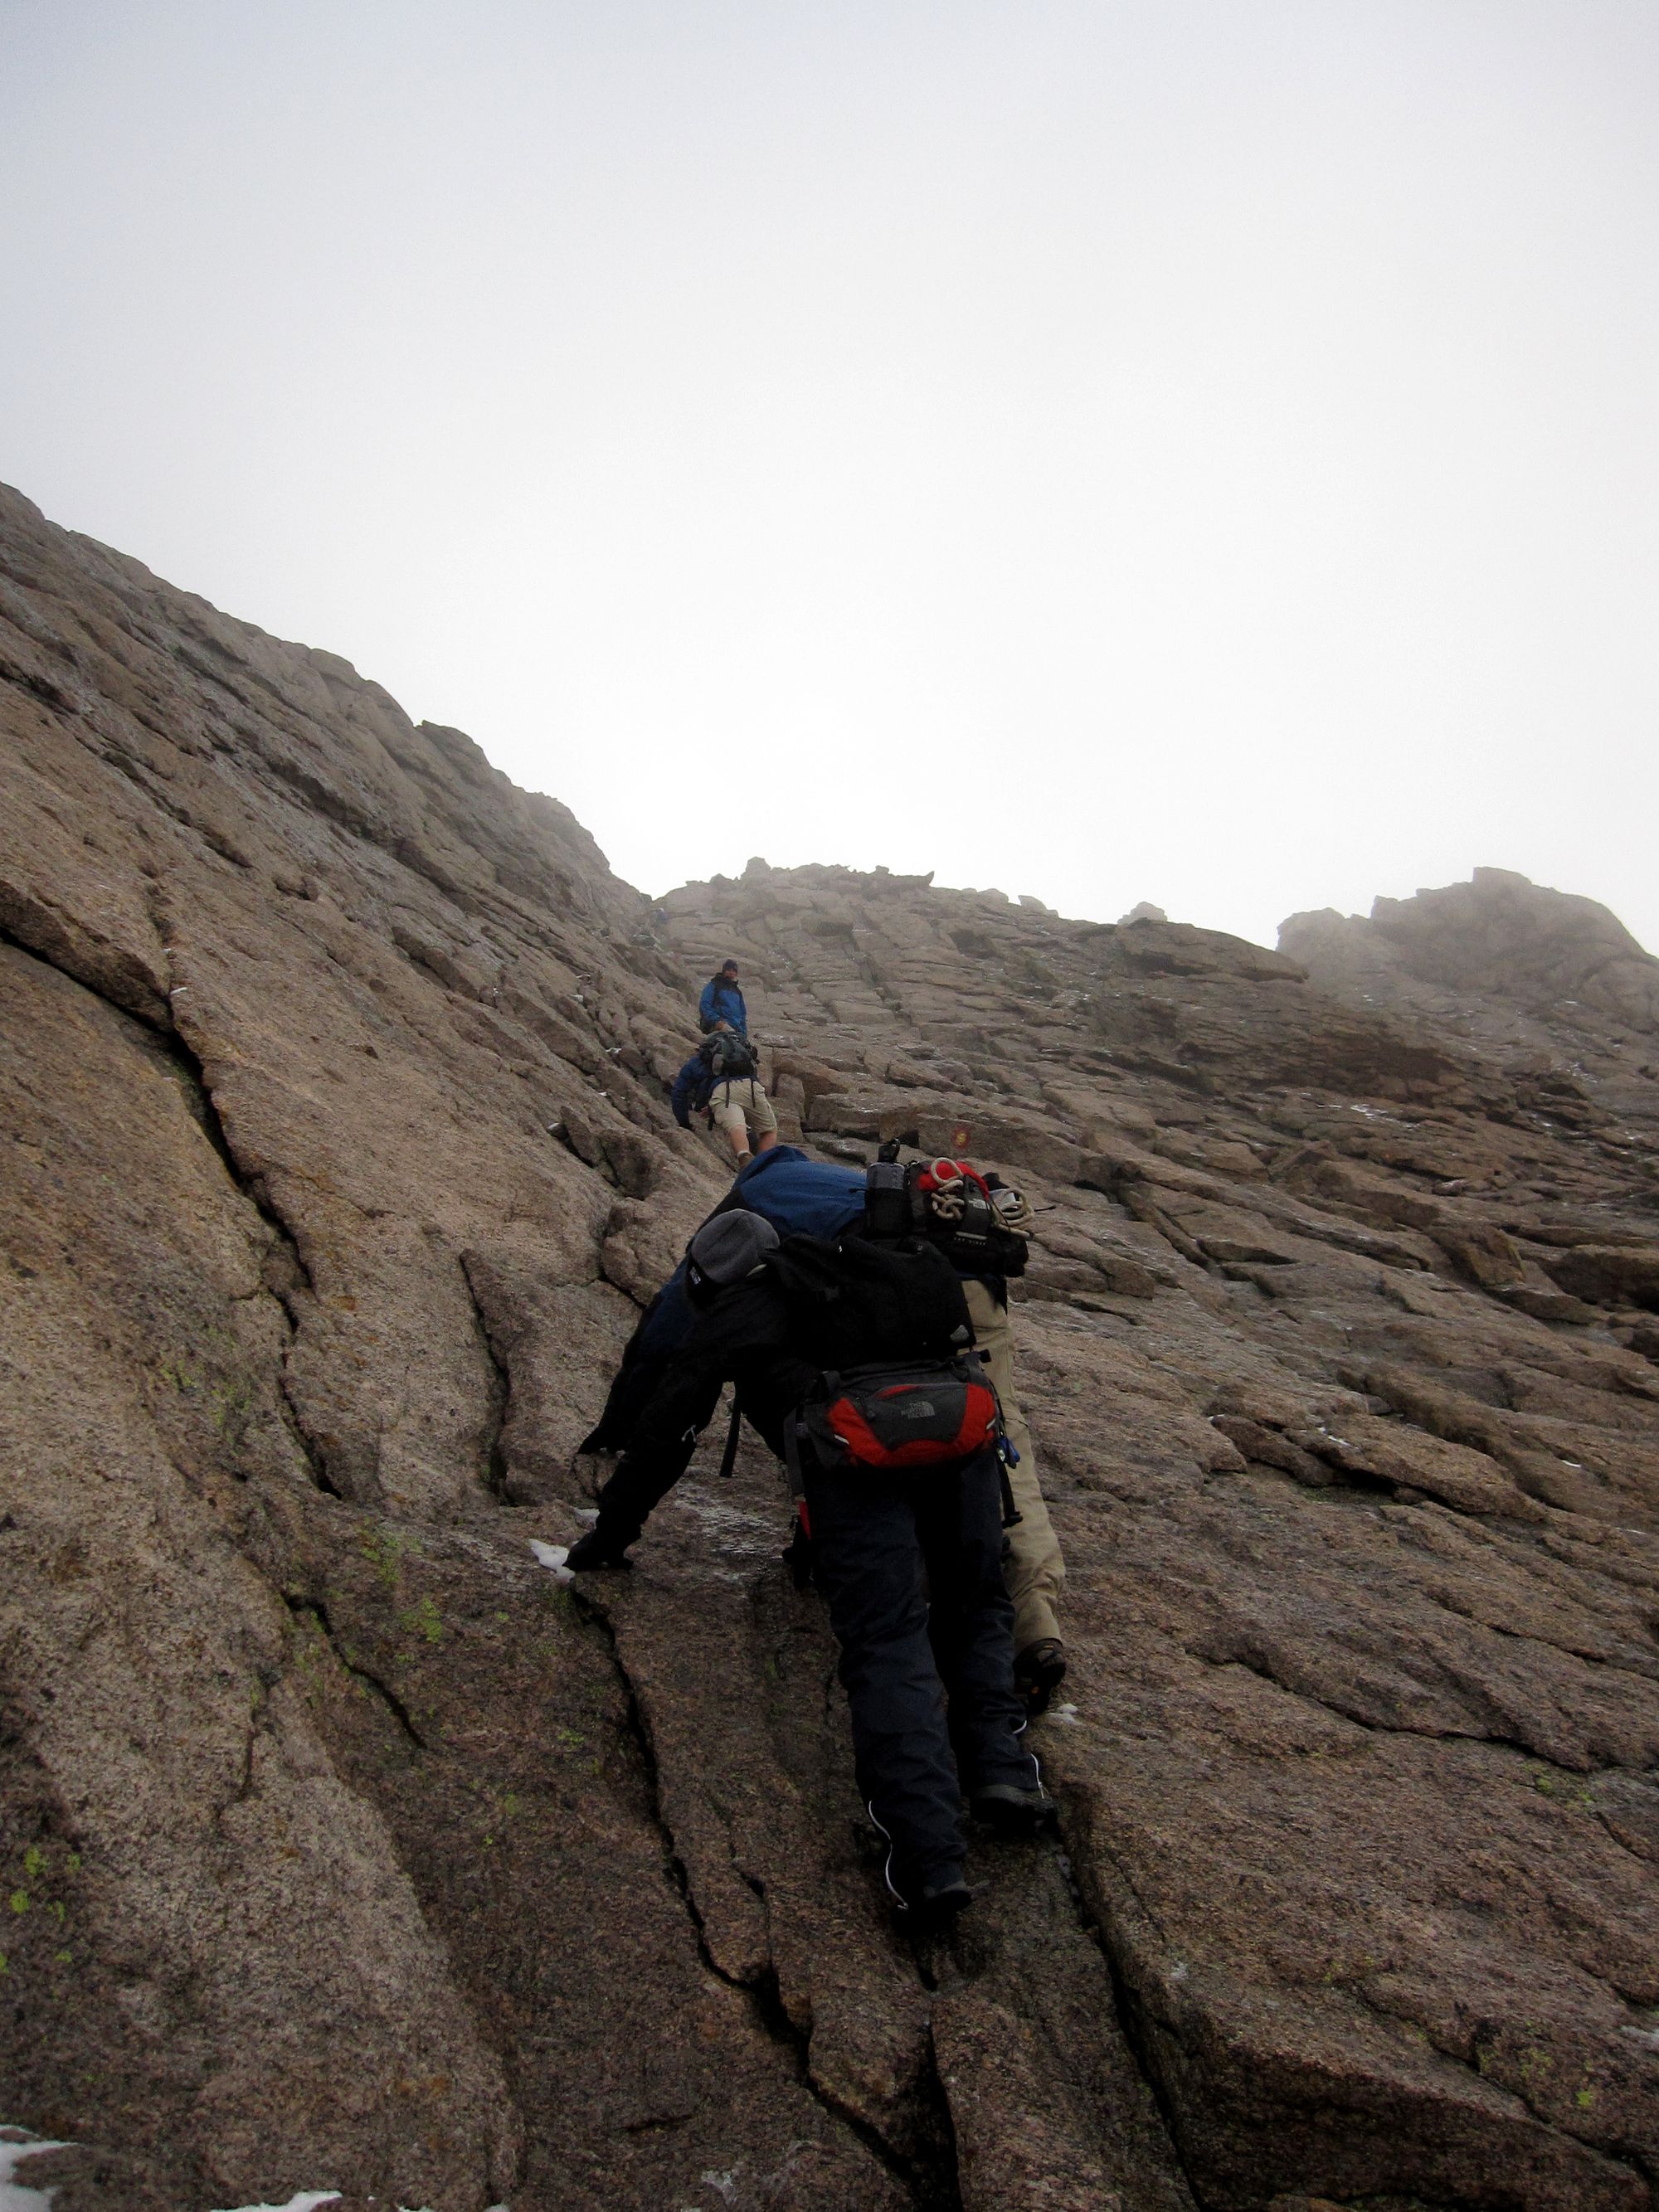
I will just come out and say it, this part of the hike is a total pain in the ass. It was one of the hardest parts of the hike for me, and where I almost fell and killed myself (no joke). You need to be very careful on this part as it is very icy and there are little to no handholds. This is where crampons would start to become useful, so if ya got em, use em. Also, TAKE IT SLOW. Pretend you are entering the school zone part of the trail, because you need to slow way down for the Notch and especially for the Home Stretch, which comes directly after the Notch.
After getting up the 15 foot boulder that is the Notch, you will be greeted by a sheer cliff face or the following:
Your first thought will be, "Are you serious?"
After you discover that is is icy, your next thought will be "Oh F#$k."
The Home Stretch is exactly that. It is about 1/4 mile vertical climb up the side of a cliff face to the summit. This is where we started to put in our blood, sweat and tears for this hike, as we didn't have gloves on. Unfortunately for us, the Home Stretch was extremely icy. Temps were hovering in the 20s with wind chill, there were very little hand or foot holds, and we didn't have any crampons (although nobody else did either). All of these factors made the hike extremely interesting and also potentially fatal. Our hands were numb and swollen to the point of ridiculous. I actually ended up getting minor frostbite from it. Bottom line, bring a good pair of gloves, you will thank me later. My friend said it best, "It was like a putting a slip and slide on the side of a cliff face and trying to climb up it." Our decision to climb up in those conditions was our own and fortunately for us, even though we were unprepared, we got away with it. Both of us came close to falling of the side of the mountain multiple times though. I slid about 6 or 7 feet down the side at one point and the thing is, once you start sliding, it is very hard to stop. Let me say it again, WE GOT LUCKY. Take what I have learned here and come up more prepared.
Despite all of that, we did end up summiting and it was, I feel, the greatest accomplishment of the trip. I had never been that high up before and it was astounding how little oxygen there is at 14,259 feet. However, we think our acclimation strategy worked, as we didn't really feel it until we got to the very top.
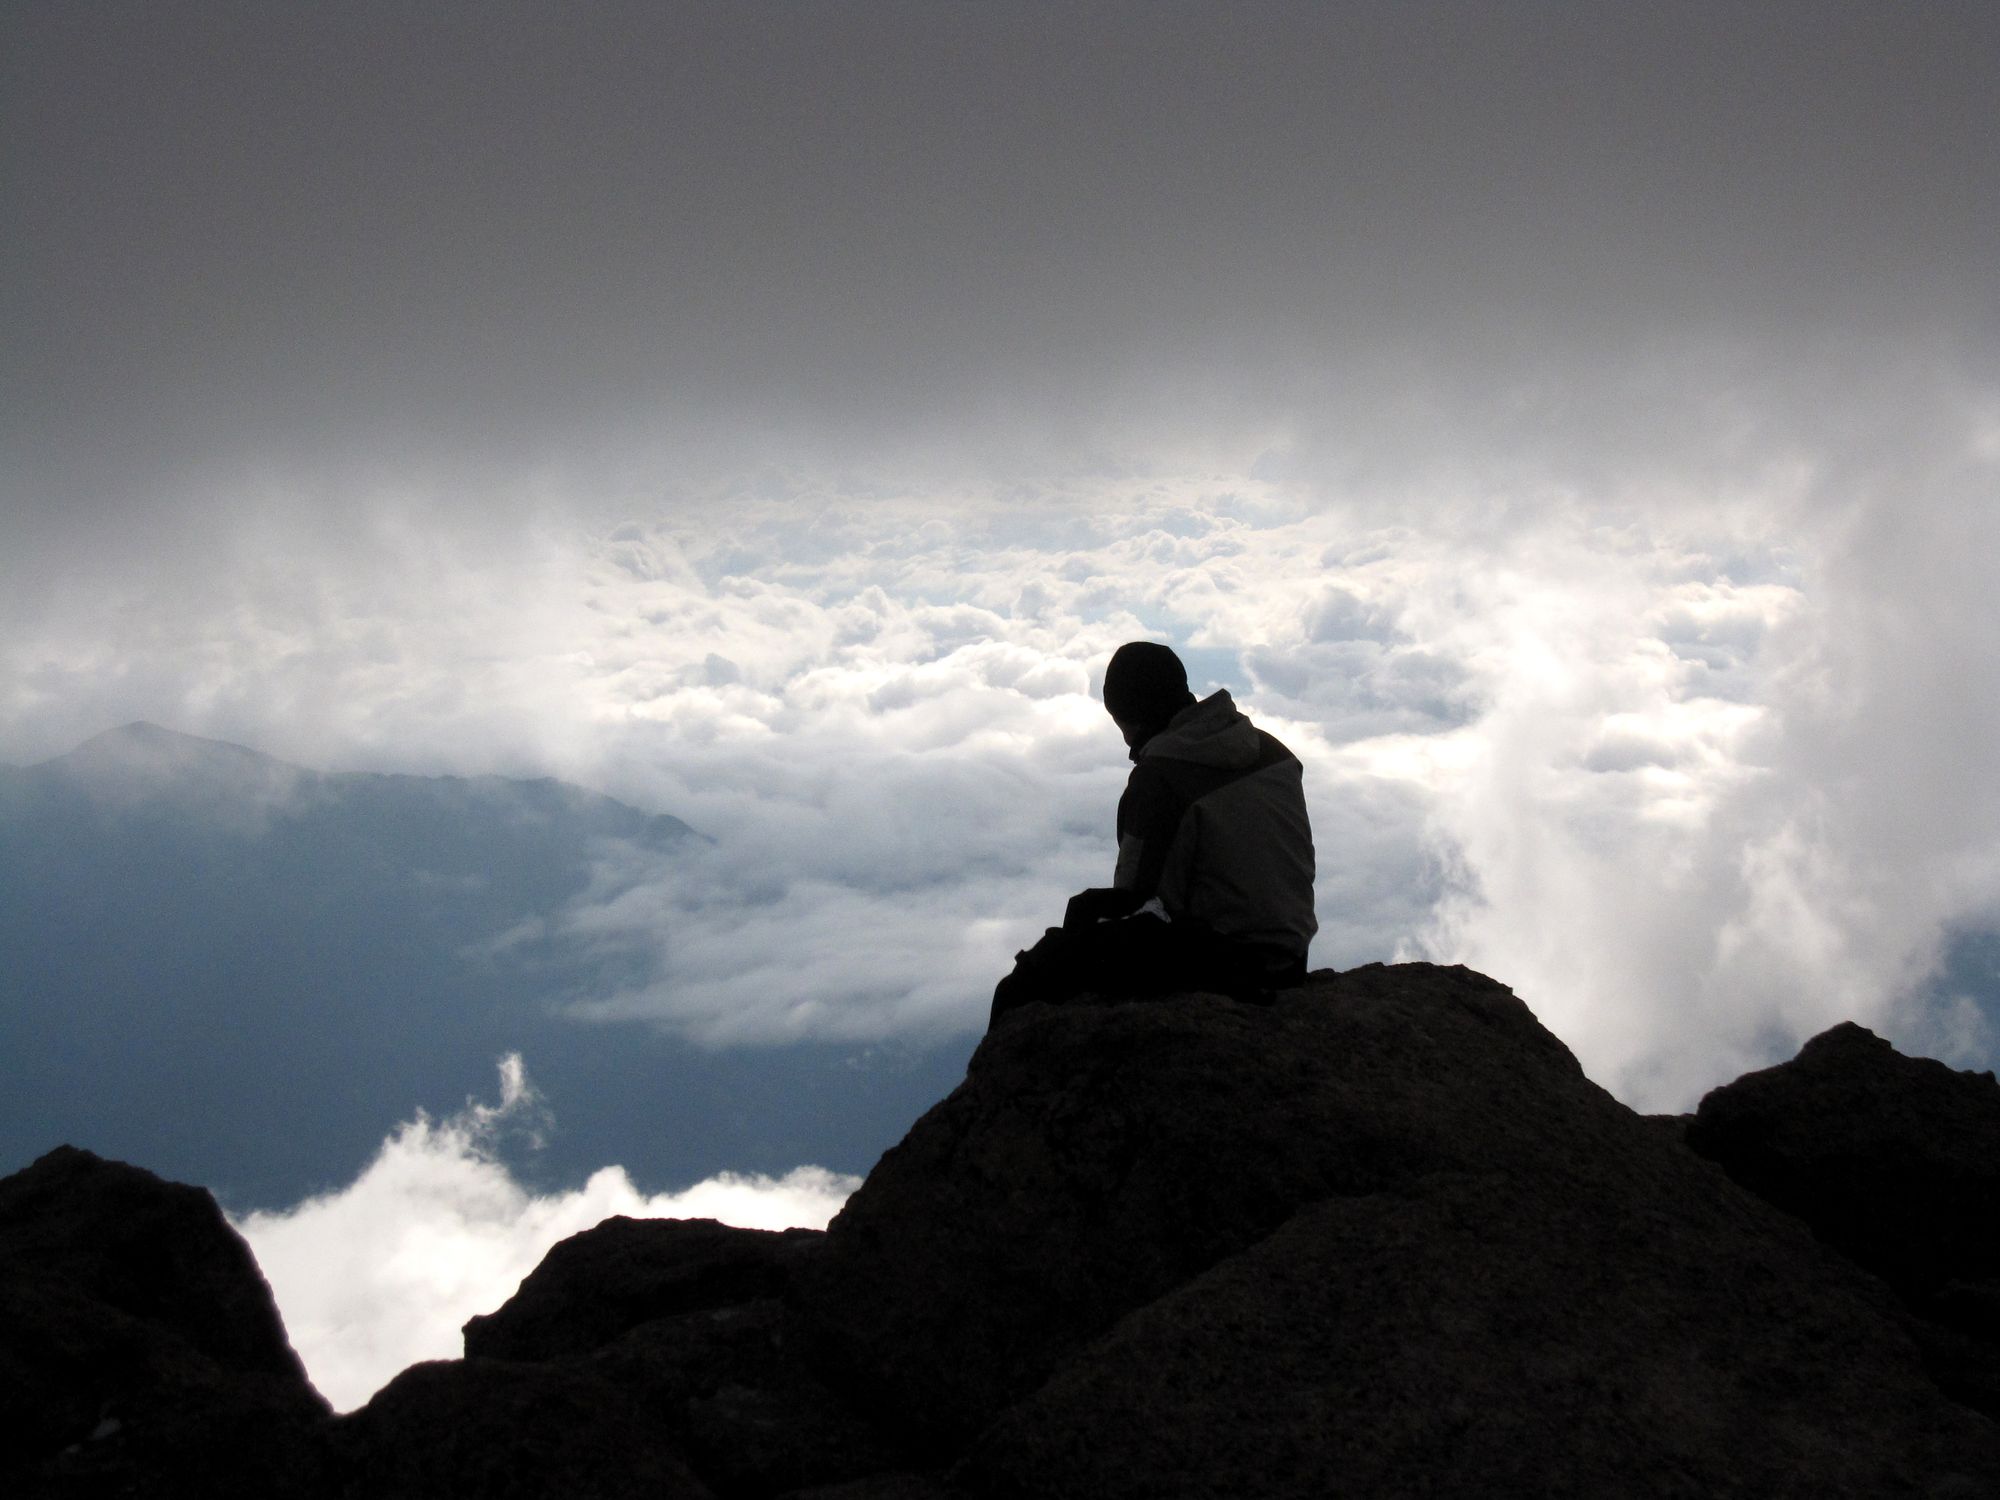
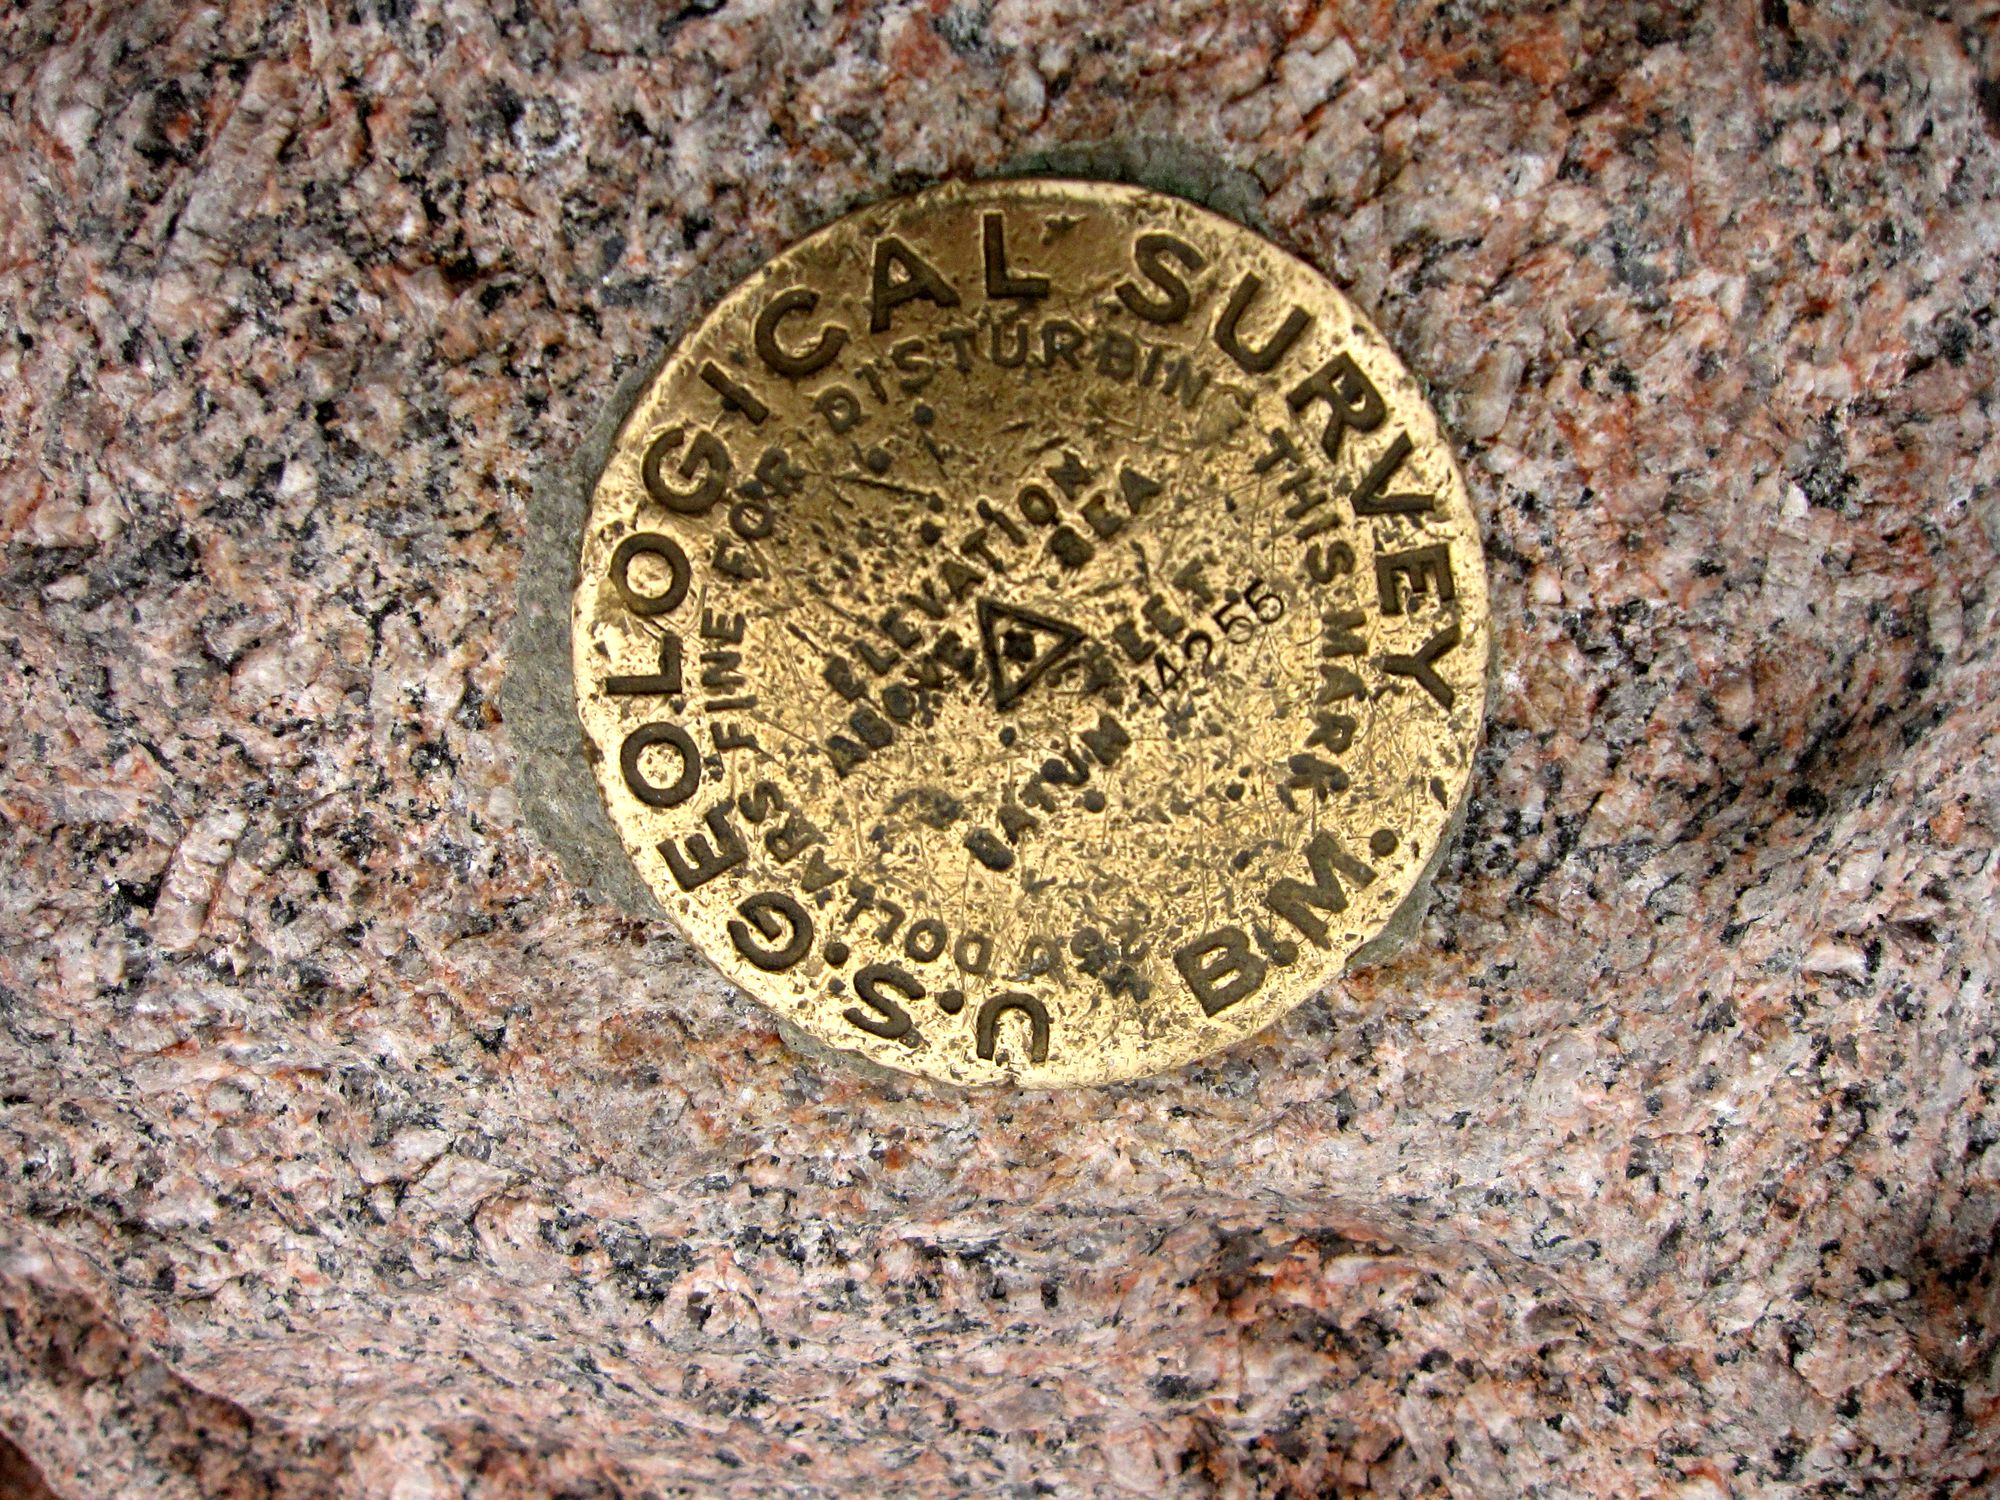
Now that you got to the top, take a break and enjoy the view if it isn't clouded in. Minutes after we got to the top, the summit clouded up, so take some pics when you can. Also, be sure to sign the guest book that is hidden near the elevation marker.
All you have to do now is go down and going down is easier right? Wrong! Not on Longs Peak. Remember that ice slip-n-slide you just climbed up? Well, now you get to try going down it without sliding off the mountain. Again, the key here is to go slow on the Home Stretch and the Notch, after that you are basically golden. Going down the Home Stretch is by far the most dangerous 1/4 mile I have ever hiked in my life. Please be careful, as it is extremely dangerous.
After that, it is a short 6.2 mile hike back through the Boulder Field to the Ranger Station and hopefully your campsite. If you have successfully summited, congratulations, you are among a select few lucky enough to have the weather, lady luck, and athleticism on your side. Seriously, it is one hell of a hike.
The entire hike took us around 13 hours and 30 minutes, as we started at 1am and were down by 3:30pm. A long and but exciting hike well worth your time.
I hope this guide to Longs Peak helps you understand the risks and the incredible hike that summiting Longs Peak can provide. If you have any questions about the trail or the hike itself, please feel free to email me. I would be happy to help.
Final Words on Rocky Mountain National Park and Longs Peak
Overall Verdict - Fantastic. Longs Peak was the most challenging hike I have ever done. The Rockies are something else.
Days/Nights to Camp/Spend Here – As many as you can, but this depends on what you are doing in RMNP.
Camping Evaluation - Longs Peak Campground is definitely the way to go if you are hiking Longs Peak. It is 1/4 mile from the trail head which is great in the morning and the end of the day, and also because everyone there is usually hiking Longs Peak as well. So there is a little bit of community there.
Best Time To See Rocky Mountain NP and Longs Peak- Morning for RMNP and the highway road, really early for Longs Peak as thunderstorms develop in the afternoon.
Tips/Tricks - Crampons and gloves + a little common sense.
Best Hikes - Lets see here .. I'll make you guess.